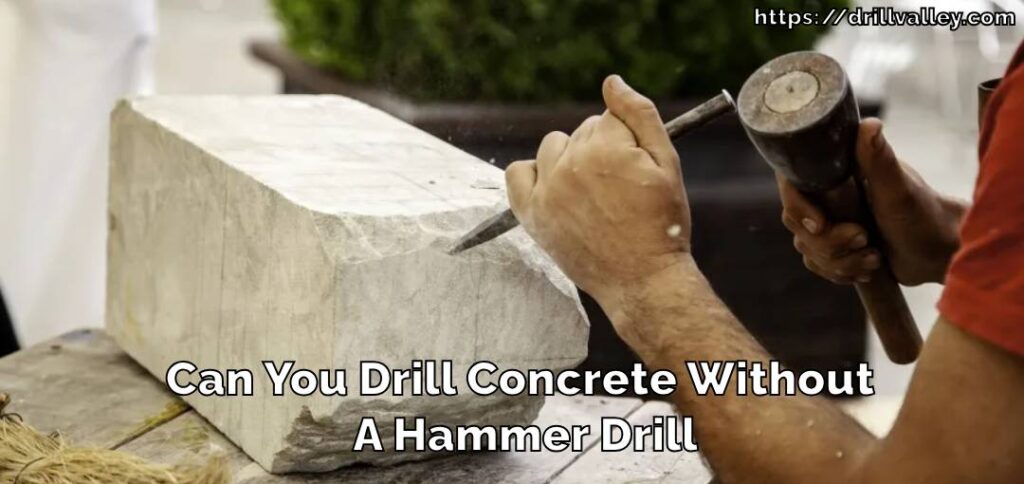
Can You Drill Concrete Without A Hammer Drill
Drilling into concrete requires both precision and the right tools, notably a hammer drill and carbide-tipped masonry bits. This task might seem daunting at first glance due to concrete’s dense composition, fortified with stone and sand for durability.
However, with the correct approach and equipment, penetrating this robust material becomes manageable. The nuances of concrete drilling are crucial, from selecting the appropriate tools to employing them effectively, ensuring both success in your project and safety during the process.
This guide aims to simplify the complexities associated with drilling into concrete, providing you with the knowledge to tackle such tasks confidently.
Can You Drill Concrete Without A Hammer Drill
Yes, you can drill concrete without a hammer drill. Drilling into concrete without the muscle of a hammer drill. Now, this might sound like a hefty challenge, and truth be told, it is. But don’t let that deter you.
With a sprinkle of ingenuity and the right gear, you’ll be punching through that concrete like it’s a piece of cake (well, maybe not that easy, but you get the drift). First things first, you’re going to want to arm yourself with a cordless drill. Yes, the very same one you might use for softer material around the house.

But here’s the catch – you’ll need to pair it with masonry drill bits. These bits are the unsung heroes of the task, featuring carbide tips that chisel away at the concrete block with determination. It’s akin to arming a knight with the finest sword – absolutely essential.
Now, you’re not just drilling; you’re performing a delicate dance. Imagine you’re creating a pilot hole, easing into it, not just for the thrill but to ensure that your concrete screws find a snug home. It’s a methodical process, drilling a bit, then pulling back, akin to a meticulous artist carving a masterpiece.
And oh, don’t forget a bucket of water by your side. A splash of cold water keeps the bit from overheating, much like cooling down after a fiery workout.
But what about those times when you’re facing a larger project or the concrete seems as stubborn as a mule? This is where the heavy-duty tools come into play – enter the impact driver and the cordless drill in hammer mode.

These are the power tools that laugh in the face of challenging materials, driving into concrete with precision and force, making them the ideal tool for the job.
While the regular drill and masonry bits combo work, an impact drill takes it up a notch, especially for driving in concrete anchors or dealing with holes in bricks. It’s all about using the effective tool for the task at hand, ensuring that even the most daunting concrete block becomes manageable.
And let’s not forget about safety – ear protection is a must. The cacophony of drilling concrete is no sweet symphony. It’s a harsh reality of the job, but with the right precautions, it becomes just another part of the process.
Amidst the dust and noise, there’s a sense of achievement. Whether it’s installing a concrete anchor, securing a plastic anchor, or tackling different brick types, each step is a testament to the power of the right tools and techniques. And when those loose pieces start to clear, thanks to a trusty vacuum cleaner, there’s a clear path to success.

While the hammer drill might be the poster child for drilling concrete, it’s not the only star of the show. With a regular drill, masonry drill bits, and a bit of elbow grease, you’re more than equipped to tackle concrete.
It’s a journey of persistence, precision, and a bit of patience. So next time you’re looking at a concrete wall, remember, it’s not an impenetrable fortress. With the right approach, it’s just another step in your DIY journey.
Preparing to Drill into Concrete
Drilling into concrete isn’t just tough it’s like going toe-to-toe with one of the hardest materials used in construction today. Picture concrete as a giant, solid block of stone that’s been crafted to stand the test of time.
It gets its incredible toughness from a mix of cement, water, sand, and gravel. Once it sets and dries, it becomes super strong and durable, making it the go-to material for everything from skyscrapers to the sidewalks in your neighborhood.
This same durability, however, turns drilling into a hefty challenge. It’s like trying to pierce through a mountain with just a tiny drill—it requires not just effort, but also the right strategy and tools.
Speaking of tools, let’s dive a bit deeper into the essential gear for concrete drilling. First up, we’ve got the “hammer drill,” a beast of a tool that combines spinning action with powerful, rapid hammer blows to the drill bit.
This dual action is key to breaking through concrete’s stubborn resistance. Imagine it as a one-two punch in a boxing match, where the spinning clears the debris and the hammering pulverizes the tough spots.
Next, there’s the “rotary drill,” which might look similar but plays a different game. It spins the drill bit, sure, but lacks the hammer drill’s punchy action. Using a rotary drill on concrete is like trying to win a race with a bicycle against motorcycles—not impossible, but it’ll take more sweat and time.
The real heroes of this story, though, are the “masonry bits.” These are not your average drill bits. They’re specially designed to tackle hard materials, with tips made of carbide—a material so hard it can scratch glass. These bits eat into concrete, making the job doable.
Getting to grips with these terms and tools is crucial for anyone looking to conquer concrete drilling. It’s about knowing your arsenal and how to use it effectively. Armed with a hammer drill and the right masonry bit, you’re all set to face the concrete challenge head-on.
Remember, it’s not just about muscle; it’s about matching the might of concrete with the clever use of tools designed for the task.
Step-by-Step Guide to Drilling into Concrete
Drilling into concrete can seem like a daunting task, but with the right approach, it’s entirely manageable. Here’s a step-by-step guide that’ll walk you through the process, making it simpler and more straightforward. Remember, the key is preparation and patience.
Step 1: Setting Up Your Workspace
Before you start, make sure your workspace is clear and safe. Move any unnecessary items out of the way to avoid accidents. Lay down a drop cloth or plastic sheet to catch any concrete dust or debris, making cleanup easier. Ensure your materials and tools are within easy reach but not in a position where they could be tripped over or interfere with your drilling.
Step 2: Creating a Drilling Point
Finding and marking your drilling point on concrete can be tricky due to its hard surface. Start by deciding where you want to drill. Then, use a pencil or marker to mark the spot clearly.
To prevent your drill bit from slipping when you start drilling, use a center punch and hammer to gently tap a small guide dent at your marked point. This little dent will help keep your drill bit in place as you begin.
Step 3: Drill Bit Installation and Depth Adjustment
Choosing the right drill bit is crucial. Ensure it’s a carbide-tipped masonry bit of the appropriate size for your project. To install it, open the chuck of your drill, insert the bit, and then tighten it securely. For drills with a chuck key, make sure to tighten all three holes on the chuck to ensure the bit is held firmly.
Next, set the depth stop on your drill if it has one. If not, measure the depth you need on the bit and wrap a piece of tape around the bit as a visual guide to ensure you don’t drill too deep.
Step 4: The Drilling Process: Tips for Efficient Drilling
Now, you’re ready to drill. Start by positioning your drill bit at the guide dent you made earlier. Begin drilling at a slow speed to establish the hole, applying steady pressure. As the bit penetrates deeper, you can gradually increase the speed.
Remember, let the drill do the work; applying too much force can break the bit or damage the drill. If you’re drilling a deep hole, periodically pull the bit out to remove debris.
Step 5: Cooling and Dust Management Strategies
Drilling into concrete generates a lot of heat and dust. To manage this, periodically pause to let the bit cool down. If you have a spray bottle, lightly misting the area with water can help keep the bit cool and reduce dust.
Alternatively, if you have a shop vacuum with a HEPA filter, you can use it to suck up dust as you drill. Keeping the work area clean and the bit cool will make the drilling process smoother and extend the life of your drill bit.
By following these steps, you’ll be well on your way to successfully drilling into concrete. Remember, the right tools and a bit of preparation go a long way in making this task easier and safer.
Advanced Tips and Techniques
When you’re tackling a project that involves drilling into concrete, especially the kind with a high aggregate mix, you’re up against a bit more of a challenge. High aggregate concrete is tougher due to larger stones and materials mixed into the concrete, making your drilling work a bit harder. But with a few advanced strategies, you can manage even the most stubborn spots.
Dealing with High Aggregate Concrete
For those hard-to-drill areas, patience and the right technique are key. Start with a smaller drill bit than your intended final hole size. This initial hole acts as a guide and makes it easier for the larger bit to do its job without wandering.
If you hit a particularly tough spot, don’t force it. Instead, pull the drill out, give it a moment, and try again at a slightly different angle. Sometimes, coming at the aggregate from a different direction can make all the difference.
Drill Bit Maintenance and Selection
Keeping your drill bits in good shape is crucial for successful concrete drilling. After each use, clean your bits to remove any concrete dust or debris. Store them in a dry place to avoid rust and corrosion. When choosing a drill bit, size matters.
Make sure the bit is appropriate for the hole you want to create. A carbide-tipped masonry bit is often the best choice for concrete. Its hard tip can handle the abrasiveness of concrete much better than a standard bit.
Finishing Touches: Post-Drilling Cleanup and Hole Finishing
Once you’ve drilled your hole, there’s still work to be done to ensure a professional finish. Start by removing any lingering debris inside the hole with a vacuum or by gently blowing it out. If the edges of the hole are rough, you can smooth them with a masonry chisel or a similar tool.
This not only improves the appearance but also prepares the hole for any inserts or fixings you plan to use. Cleaning up your workspace is just as important. Sweep up any concrete dust and dispose of it properly to keep your area safe and tidy.
These advanced tips and techniques are designed to help you navigate the challenges of drilling into concrete, from dealing with tough aggregate mixes to ensuring your drill bits last as long as possible. With the right approach, even the toughest drilling jobs can be made manageable.
Troubleshooting Common Problems
When you’re drilling into concrete and hit a snag, it can feel like you’ve hit a brick wall. But don’t worry; most problems have straightforward solutions. Let’s walk through some common issues and how to fix them:
- Drill Bit Isn’t Cutting Through: If your drill bit isn’t making progress, it might be blunt or the wrong type. Make sure you’re using a carbide-tipped masonry bit and that it’s sharp. If it’s worn out, replace it with a new one.
- Drill Overheats: Drills can get too hot to handle, literally, when working on concrete. To prevent overheating, take frequent breaks and allow the drill to cool down. Spraying a little water on the bit can also help keep the temperature down.
- Dust Overload: Concrete drilling creates a lot of dust, which can be a nuisance and a health hazard. Using a vacuum attachment to suck up dust as you drill or dampen down the area with water can keep the mess under control.
- Bit Gets Stuck: If your drill bit gets stuck in the concrete, reverse the drill’s direction to try and wiggle it free. If that doesn’t work, gently tap the drill (not too hard, or you risk damaging the drill or bit) to loosen the grip.
- Hole Size Issues: If the hole you’re drilling is too small or not the right shape, double-check that you’re using the correct bit size. For larger holes, start with a smaller bit to create a guide hole, then switch to the larger size to finish.
- Surface Cracks: Drilling can sometimes cause the concrete surface to crack, especially if you’re working near an edge or if the concrete is old and brittle. To minimize cracking, start drilling at a lower speed and avoid pushing too hard. Using a drill with a hammer action can also help.
Remember, patience is key when drilling into concrete. Take your time, and don’t force the drill. With the right approach, you can overcome these common problems and achieve a clean, precise hole.
Conclusion
Drilling into concrete is achievable with the right approach: use a hammer drill and carbide-tipped masonry bit, wear proper safety gear, and manage dust with vacuums or water. Mark your drilling point, adjust the drill bit depth, and proceed with patience. For tough spots or precise needs, consider professional help.
With these strategies, tackle your concrete drilling projects confidently and safely.
You may also read – Can You Use Different Brand Drill Bits?
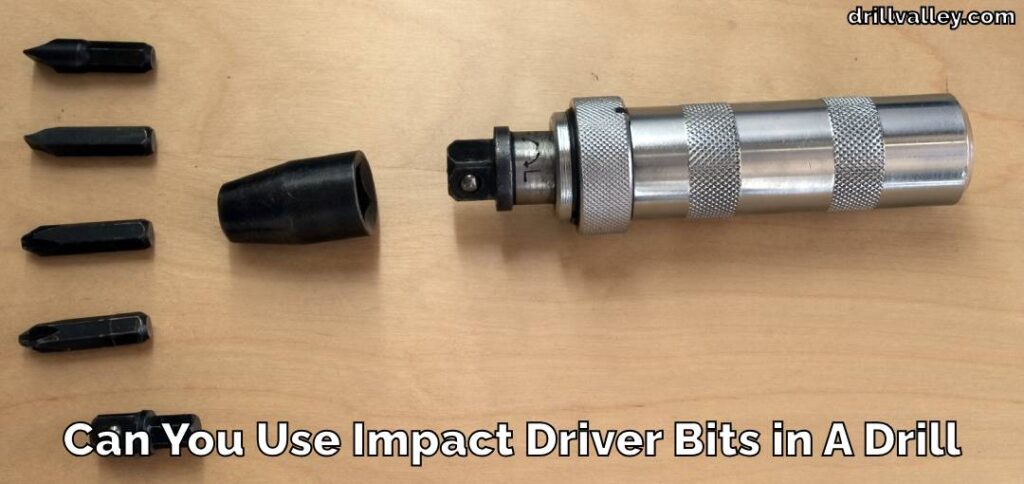
Can You Use Impact Driver Bits in A Drill
Knowing whether you can swap impact driver bits into a regular drill matters more than…

Can You Drill Into Popcorn Ceiling
Wondering Can You Drill Into Popcorn Ceiling for your next home improvement project? Popcorn ceilings,…
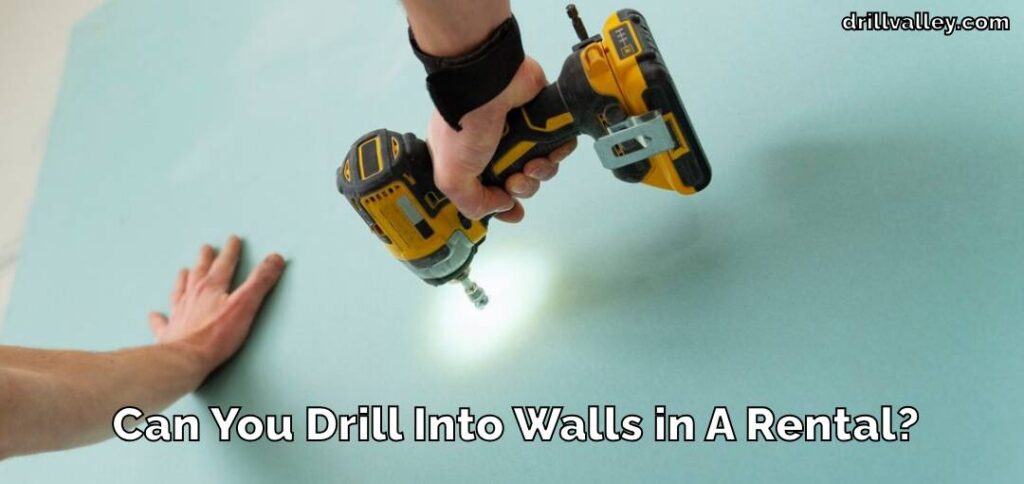
Can You Drill Into Walls in A Rental?
Renting an apartment brings the challenge of personalizing your space within the confines of rules…
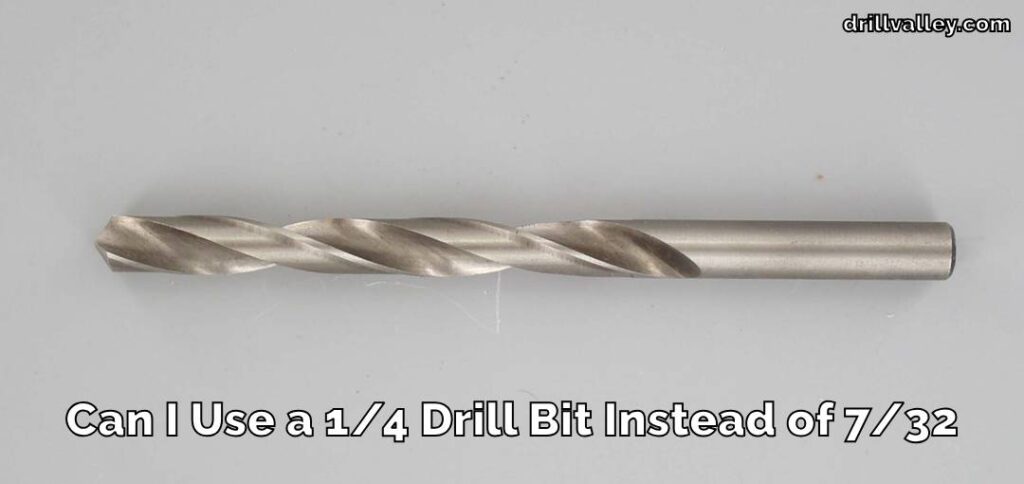
Can I Use a 1/4 Drill Bit Instead of 7/32
When you’re elbows deep in a project and suddenly realize the 7/32 drill bit you…
Can You Drill Concrete Without A Hammer Drill
Drilling into concrete requires both precision and the right tools, notably a hammer drill and…
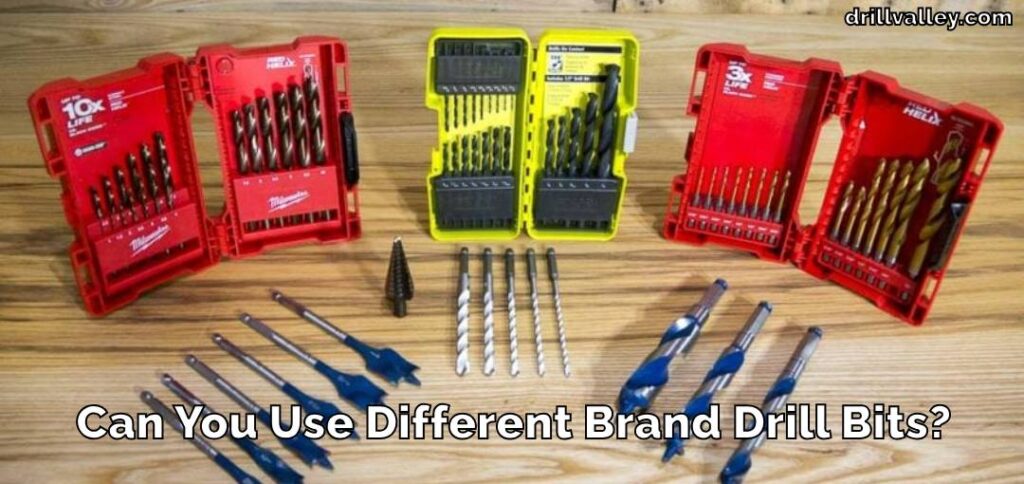
Can You Use Different Brand Drill Bits?
The right drill bit size is crucial for any project, big or small. It’s the…