Can You Drill Into Walls in A Rental?
Renting an apartment brings the challenge of personalizing your space within the confines of rules set by landlords or property management. It’s a common predicament: wanting to hang pictures or add shelves, but pausing at the question, “Can I drill holes without trouble?”
Understanding your lease terms and legal boundaries is essential before making any modifications. It’s not just about decoration but also about safeguarding your security deposit and avoiding legal issues. Let’s clear up the confusion about what modifications are permitted, ensuring you can make your rental feel like home, responsibly.
Can You Drill Into Walls in A Rental?
Nudging holes into the white walls of your apartment often feels like a rite of passage when personalizing your space. However, whether you’re dreaming of setting up a gallery wall or just hanging a single piece of furniture, it’s crucial to glance at your lease contract first.

This document isn’t just another piece of paper; it’s your guide to understanding what’s allowed in your rented home and what could potentially cost you your security deposit.
For many, the allure of transforming blank walls into a personalized haven is strong. Yet, the question of drilling holes in apartment walls is a common dilemma. The answer? It’s not black and white. Your lease contract is the go-to resource for clarifying these gray areas.
Some agreements offer a semblance of freedom, permitting minor alterations like small holes in walls that can easily fall under the category of ordinary wear or fair wear. This leeway means you can bring life to those white walls without fear of retribution.
But what if your lease contract explicitly forbids making any holes in the walls, exterior wall included? Before you resign yourself to living with blank walls, consider alternatives like command hooks. These nifty gadgets adhere to many surfaces and can support various weights, making them perfect for tenants who wish to decorate without the permanence of drilling.
They’re a brilliant workaround, allowing you to showcase your style and personality through a gallery wall or any other arrangement, without leaving a mark.
Sometimes, the lease might not address this issue directly. In such cases, don’t leap to conclusions or rely on assumptions. Reach out to your landlord or property manager. A straightforward conversation can often illuminate the situation better than any document.
They might even give you the green light to drill, provided you agree to patch things up before you move out. The takeaway here is simple: familiarize yourself with the ins and outs of your lease contract and maintain open communication with your landlord.

This approach ensures you can make your apartment feel like home, whether that means adorning your space with art, photos, or any decor that speaks to you, all while staying within the bounds of your agreement and preserving your security deposit.
After all, a home should be a reflection of the people who live in it, even if it’s a temporary spot on your journey.
Initial Steps Before Drilling
Before diving into any project that involves making changes to your rental, the first essential step is reaching out to your landlord or property manager. This approach is not just about sticking to the rules but also about showing respect for the property you call home and keeping a solid, positive relationship with those managing it.
Step 1: Plan Your Decorating Project

Think about what you want to achieve. Is it hanging pictures, installing shelves, or maybe mounting a TV? Knowing exactly what you want to do helps when explaining your plans.
Step 2: Prepare Your Questions and Information
Write down what you’re planning to hang or install, the tools you’ll need, and how you plan to fix any potential damage. This preparation will make your request clearer and show that you’ve thought it through responsibly.
Step 3: Reach Out to Your Landlord or Property Manager
This can be a call, an email, or a face-to-face meeting, depending on what’s most appropriate. Be honest and detailed about your plans. Highlight your commitment to keeping the property in good condition.
Step 4: Listen and Negotiate

Be open to your landlord’s feedback. They might have valuable advice or alternative solutions. If they have specific conditions or require that you use certain materials, make sure you understand and agree to them.
Step 5: Get Approval in Writing
If your landlord approves your plan, ask for this permission in writing. This could be a formal letter or an email. Having a written record protects both you and your landlord and ensures everyone’s on the same page.

Remember, a little effort in communication can go a long way in making your living space your own, all while keeping a great relationship with your landlord.
Safety Precautions When Drilling
Playing it safe is not just about following rules; it’s about ensuring you don’t accidentally cause damage that could be costly or dangerous. Before you start, it’s crucial to identify where it’s safe to drill to avoid hitting any hidden electrical wiring or plumbing that’s lurking behind your walls. Here’s how you can go about it:
- First, use a stud finder. This handy tool helps you locate the wooden frames inside your walls, which are the safest spots to drill into. More importantly, it can help you steer clear of areas that might hide electrical wires or pipes.
- Second, know the layout of your apartment. Generally, wiring and plumbing run vertically or horizontally to outlets and fixtures like sinks and light switches. Avoid drilling directly above or below these points to minimize risks.
- Safety gear is also essential. Always wear protective goggles to shield your eyes from dust and debris. Gloves can protect your hands from sharp edges, and a dust mask is good to have if you’re sensitive to dust or if there’s a lot of plaster involved.
- Using the right tools makes a difference too. Ensure your drill bits are suitable for your wall type—whether it’s drywall, plaster, or concrete. A drill with adjustable speed settings can also help you control the drilling process better, reducing the chance of going too deep or drilling too fast.
Taking these safety precautions can save you from a world of hassle. By identifying safe areas to drill and using the right tools and gear, you not only keep yourself safe but also protect the integrity of your rental home.
Remember, when in doubt, it’s always better to ask a professional for help or get a second opinion from your landlord. This way, you ensure your home improvement efforts are both successful and safe.
Negotiating Modifications with Your Landlord
Haggling over apartment modifications with your landlord needn’t be an uphill battle. It boils down to presenting your case coherently and striking a deal that benefits both sides. Here’s your strategy for a fruitful discussion that leads to a thumbs-up on your decor dreams.
Kick things off with a well-thought-out blueprint of the alterations you’re eyeing. This includes the nuts and bolts of the modifications, their necessity, and your method for pulling them off seamlessly. Say you’re keen on painting a wall a bright color or fixing up shelves; spell out how these tweaks could not only jazz up your living space but also enhance the property’s charm and worth over time.
Timing is everything in this dialogue. Pick a moment for your pitch when your landlord is free from the hustle and bustle. A routine maintenance visit or the lease renewal period could be the perfect window for a laid-back yet meaningful chat.
Flexibility is your friend here. Your landlord may have reservations about the scale of your proposed changes or specific details like the drilling of holes or the choice of a bright color. Hear them out and be willing to bend a bit. This might mean opting for less intrusive installation methods or tweaking your color palette.
Sealing the deal in black and white is non-negotiable. This agreement should cover the scope of work, timelines, responsibilities, and any stipulations about reverting the property to its original state if need be. This document is a safeguard for you and your landlord, ensuring there’s no room for misinterpretation about what’s been consented to and protecting your deposit.
Navigating a negotiation with your landlord is about clear-cut communication, empathizing with their viewpoints, and finding a happy medium that honors the property’s integrity while letting you sprinkle a bit of your essence into your living space. Locking in permission via a written pact not only cements this mutual understanding but also sets your mind at ease as you personalize your rental.
Alternative Decorating Options
Decorating your rental without leaving a mark can be both fun and easy. Here’s a bullet-point guide to using adhesive products and eco-friendly decorating ideas:
Command Strips
- Ideal for hanging lightweight items like photo frames.
- Heavy-duty versions are available for larger pictures or mirrors.
- Ensure the wall surface is clean before applying.
- Follow the package instructions for application and wait time.
Eco-Friendly Adhesive Products
- Look for adhesives made from sustainable materials or that are recyclable.
- Choosing eco-friendly options helps protect your rental and the planet.
Washi Tape for Decoration
- Great for creating removable wall art and personalizing items.
- Available in various colors and patterns.
- Easy to remove, making it perfect for temporary decoration.
Tips for Using Adhesives
- Always select the right strength for the item you’re hanging.
- Follow the removal instructions to avoid wall damage.
- Test in an inconspicuous area if unsure about the wall’s reaction.
Eco-Friendly Decorating Ideas
- Use plants to add life and color to your space. Choose pots that can stand on surfaces or use adhesive hooks for hanging plants.
- Recycle and repurpose items to create unique decorations.
- Use LED lights for energy-efficient lighting that enhances the ambiance.
Advantages of Adhesive Decorating
- Change your decor easily without worry.
- No need for drilling means walls stay intact.
- Perfect for renters who want to personalize their space temporarily.
By incorporating these ideas and products, you can easily and responsibly decorate your rental, making it feel like home without compromising your security deposit or damaging the walls.
DIY Guide to Repairing Wall Damage
Fixing nail holes in your walls is a skill that comes in handy, especially when moving out of a rental. Here’s a straightforward DIY guide to repairing wall damage, ensuring your walls look as good as new, and helping you secure that security deposit.
Step 1: Identify the Type of Wall
Drywall: Most common, made from gypsum plaster.
Plaster: Found in older homes, harder than drywall.
Wood: Less common for interior walls, requires wood filler.
Step 2: Choose the Right Filler
For drywall and plaster: Use lightweight spackle.
For wood: Opt for wood filler to match the grain.
Step 3: Prepare the Area
Clean the hole and surrounding area with a damp cloth to remove dust and debris.
Ensure the wall is dry before proceeding.
Step 4: Apply the Filler
Using a putty knife, apply the filler into the hole. For small holes, a dab will do. For larger holes, press the filler in and smooth it out.
Overfill the hole slightly; the filler will shrink as it dries.
Step 5: Let It Dry
Follow the drying time specified in the filler’s instructions. This can vary from a few hours to overnight.
Step 6: Sand the Surface
Once dry, gently sand the area with fine-grit sandpaper until smooth and flush with the wall.
Step 7: Paint Over the Patch
Prime the patched area with a small brush to ensure paint adherence.
Paint over the primer with a color that matches your wall. You might need to paint the entire wall for a seamless match, depending on the age of the paint and exposure to sunlight.
Choosing the Right Materials
Spackle vs. Joint Compound: Spackle is quicker to dry and ideal for small repairs, while joint compound is suited for larger patches but takes longer to dry.
Paint: Use leftover paint if available for an exact match. If not, bring a chip of the existing paint to a hardware store to find the closest color match.
Repairing wall damage is a simple process that can make a big difference in the look of your room. Whether you’re patching up a tiny nail hole or covering a larger area, the key is to take your time and use the right materials for your wall type.
With a little effort, you can restore your walls to their original condition, making your space feel refreshed and well-cared for.
Safety and Environmental Considerations
When fixing up your walls or decorating your space, picking materials that are both safe and kind to our planet is a smart choice. It’s not just about making your living area look good, but also about ensuring it’s a healthy environment for you and reducing harm to the environment.
For Wall Repairs
Look for spackle or fillers that are labeled as low-VOC (Volatile Organic Compounds). These compounds can affect indoor air quality and your health.
Choosing eco-friendly paint is another wise move. Paints that are low-VOC or no-VOC and made from natural materials not only reduce harmful emissions but are also better for your indoor air.
For Decorations
When it comes to hanging decorations, opt for adhesive hooks and strips that can be removed without leaving residue or causing damage. Some brands offer eco-friendly options that are made with less plastic and more sustainable materials.
For items like picture frames or shelves, seek out products made from recycled or sustainably sourced materials. Bamboo, for example, is a fast-growing resource that makes for sturdy and attractive decor.
Safety Tips
Always wear protective gear like gloves and masks when doing any kind of repair work or painting to protect yourself from dust and chemical exposure.
Ensure the room is well-ventilated, especially when painting or using any products that could release fumes.
Environmental Considerations
Dispose of any leftover paint or chemicals properly. Many communities have hazardous waste collection programs to help with this.
Consider donating usable materials instead of throwing them away. If you have leftover paint that won’t be used, see if local community centers, schools, or art programs can use it.
Choosing safe and eco-friendly materials for your wall repairs and decorations is not just a personal health choice but also a step towards a more sustainable lifestyle.
By being mindful of the products you use, you can create a space that’s not only beautiful and healthy for you but also respects our environment.
This approach allows you to enjoy your refreshed space with peace of mind, knowing you’ve made decisions that are good for you and the earth.
Real-life Examples and Testimonials
Hearing from people who’ve navigated rental decorating and wall repairs can shed light on the best practices and inspire others to tackle their projects confidently. Here are a few real-life examples and testimonials that bring these experiences to life.
Jenny’s Story
Jenny wanted to add some warmth to her rental apartment without losing her security deposit. She used adhesive hooks to hang lightweight frames and fabric wall hangings. “It was important to me to make the place feel like mine, but I didn’t want to deal with filling holes or repainting when I moved out. They held up my decorations all year, and when it was time to move, they came off clean.”
Mark’s Experience
Mark faced a challenge when he noticed a few small holes in his living room wall. Concerned about his security deposit, he decided to repair them himself. “I was a bit nervous at first, but after watching a couple of DIY videos, I felt ready.
I picked up some low-VOC spackle and a putty knife from the local hardware store. The process was straightforward, and painting over the repairs made the walls look as good as new. I was proud of the work and happy to get my full deposit back.
Linda’s Eco-Friendly Decor
Linda is passionate about sustainability and wanted her apartment decor to reflect that. She chose decorations made from recycled materials and used plant-based paints for an accent wall. “Creating a space that was both beautiful and eco-friendly was important to me.
I found some amazing pieces made from recycled glass and wood, and the low-VOC paint added just the right touch without harming indoor air quality. It felt great knowing my choices were good for the environment.”
These stories highlight the importance of choosing the right materials and methods for decorating and repairing rental properties. Whether it’s opting for adhesive hooks to avoid making holes, using eco-friendly materials for decor or tackling DIY repairs to save on costs and protect the security deposit, there’s a wealth of strategies that renters can use.
These real-life examples show that with a little creativity and care, you can make any rental feel like home while being mindful of the environment and your wallet.
Conclusion
The balance between personalizing your rental space and maintaining a positive relationship with your landlord. Key takeaways include the importance of communication before making changes, opting for non-permanent decor solutions like adhesive strips, and selecting eco-friendly materials for a healthier living environment.
Real-life examples have shown us that with creativity and responsible choices, transforming a rental into a personalized home is entirely achievable. Remember, your rental can reflect your unique style without leaving a lasting mark.
So, approach your decorating projects with care, respect for your rental agreement, and a dash of creativity to make your rental feel like home.
You may also read – Can I Use a 1/4 Drill Bit Instead of 7/32
Can You Use Impact Driver Bits in A Drill
Knowing whether you can swap impact driver bits into a regular drill matters more than…
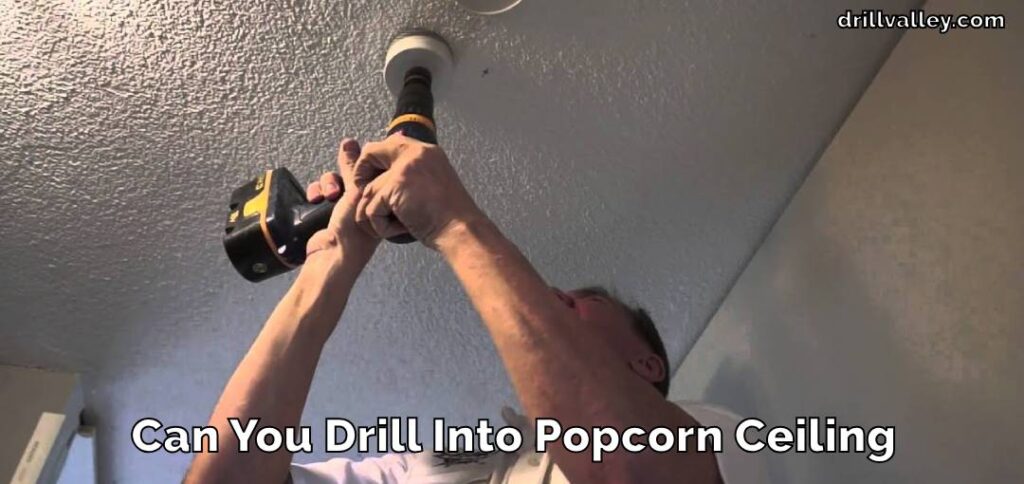
Can You Drill Into Popcorn Ceiling
Wondering Can You Drill Into Popcorn Ceiling for your next home improvement project? Popcorn ceilings,…
Can You Drill Into Walls in A Rental?
Renting an apartment brings the challenge of personalizing your space within the confines of rules…
Can I Use a 1/4 Drill Bit Instead of 7/32
When you’re elbows deep in a project and suddenly realize the 7/32 drill bit you…
Can You Drill Concrete Without A Hammer Drill
Drilling into concrete requires both precision and the right tools, notably a hammer drill and…
Can You Use Different Brand Drill Bits?
The right drill bit size is crucial for any project, big or small. It’s the…


