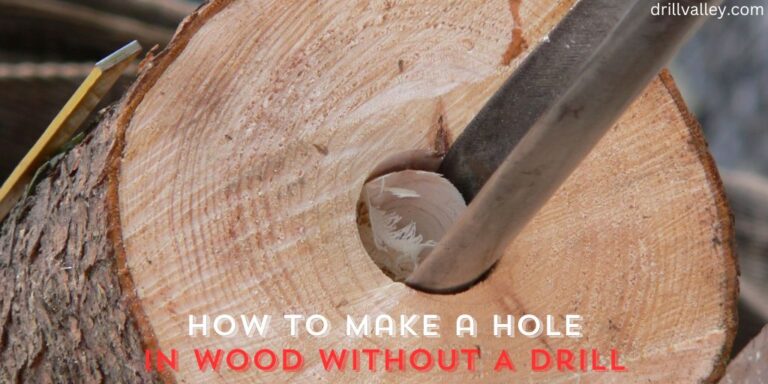
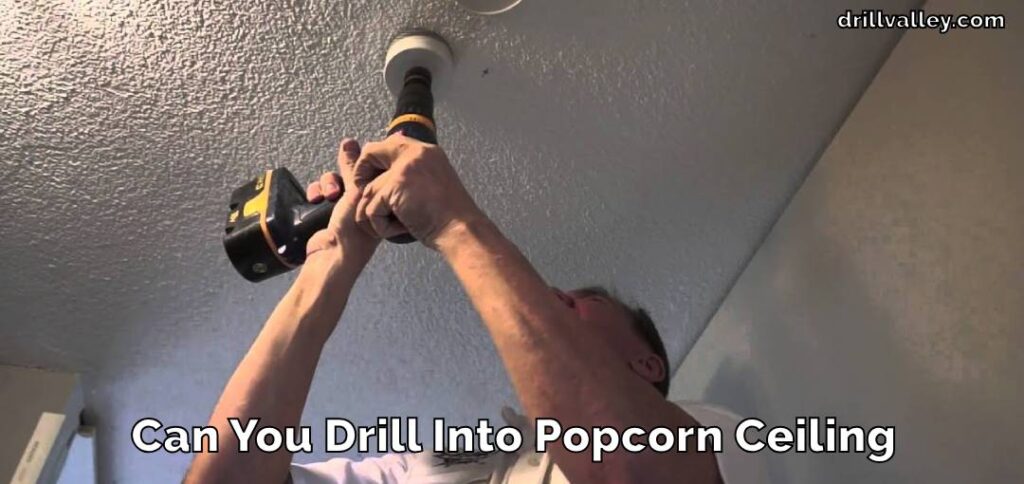
Can You Drill Into Popcorn Ceiling
Wondering Can You Drill Into Popcorn Ceiling for your next home improvement project? Popcorn ceilings, a hallmark of home decor from the 1950s to the 1980s, offered an affordable way to hide ceiling imperfections with their textured look.
However, before you start drilling, it’s essential to consider what lies beneath that texture. Many older homes with these ceilings might unknowingly harbor asbestos, especially if installed before the 1990s.
Asbestos was once favored in construction for its fire-resistant properties but is now recognized for its health risks, including severe lung problems when inhaled. Therefore, if your house features this type of ceiling and you’re contemplating any renovations, confirming the presence of asbestos is critical.
Seeking assistance from a professional can safeguard your health, ensuring your dwelling remains a secure environment.
Can You Drill Into Popcorn Ceiling
Yes, you can drill into a popcorn ceiling, but you need to be careful and aware of a few things before you start.
Drilling into a popcorn ceiling is definitely possible, but it’s not as straightforward as drilling into other types of ceilings. These ceilings have a unique, bumpy texture that was super popular back in the day because it was an easy fix for hiding imperfections and added a cozy vibe to rooms.
But, before you grab your drill, there’s something important to consider: the age of your house. If your home was built before the 1990s, there’s a chance that the popcorn texture might contain asbestos—a harmful material that was commonly used in construction for its fire-resistant properties.
Breathing in asbestos fibers can lead to serious health issues, including lung diseases. So, if your heart’s set on adding some decorations or maybe installing a new light fixture, first make sure to check what’s in your ceiling. You can get a professional to take a small sample and test it for asbestos.
If it’s clear, you’re good to go, but if not, you’ll need experts to handle it safely. When you do start drilling, go slow to minimize the mess. The texture can crumble easily, so it’s a bit of a balancing act to keep everything neat while making sure your drill bit doesn’t wander off course.
With the right prep and care, you can safely drill into your popcorn ceiling and start your next project.
Asbestos Safety Precautions
Let’s dive straight into a topic that hits close to home for many: ensuring safety when it comes to those popcorn ceilings in houses crafted before the glittery era of the 90s. Popcorn ceilings and asbestos go hand in hand, much like peanut butter and jelly, except this combination is far from sweet.
Asbestos, hailed for its resistance to fire, later unveiled its dark side, proving hazardous when its tiny fibers take a detour through the air and into our lungs. So, if there’s a suspicion your ceiling could be a party spot for asbestos, hold off on any renovation plans until you’ve done your homework.
Before You Start
Hold your horses before you drill or scrape that ceiling. Wondering if asbestos has made your ceiling its home? You can’t eyeball this one. A must-do is professional testing. This involves a wee bit of your ceiling taking a trip to a lab, where the experts play detective to spot any asbestos lurking.
Professional Inspection and Testing
This isn’t a DIY moment. Asbestos inspectors, armed with their know-how, collect samples without turning your home into a danger zone. They’re like the Sherlock Holmes of home safety, knowing precisely where to hunt and what clues to look for. Find asbestos? They’ll map out your next steps, be it removal or a clever cover-up.
Understanding the Risks
Let’s get real about disturbing asbestos. It’s akin to opening Pandora’s Box. Inhaling asbestos fibers is no small affair, with outcomes ranging from lung diseases to mesothelioma, a shadowy figure in the cancer family. The playbook on handling asbestos is thick for a reason, safeguarding you, your kin, and any renovation rangers from harm.
Legal and Safety Implications
There’s a rulebook on the do’s and don’ts with asbestos. Skirting these laws not only invites legal headaches but endangers health. Certified pros are the way to go, equipped with the right gear and knowledge to tackle this beast safely.
If your popcorn ceiling falls under the asbestos spotlight, treading carefully is your best bet. Viewing that ceiling with suspicion is the first step on a journey toward a safe, lawful home. It’s not about ticking items off a checklist; it’s about weaving safety into the fabric of your home life.
In this context, let’s consider practical elements like duct tape or command strips, which might appear mundane but are unsung heroes for minor fixes without stirring up the asbestos issue. Textured ceilings?
They’re charming until you start thinking about the asbestos risk. Before converting to a flat ceiling or dreaming about bold ceiling colors, asbestos testing should be your mantra.
Planning to jazz up your ceiling or walls? Pause before you start the saga of drilling holes for anchor routes or hanging frames with command strips to avoid disturbing the peace of asbestos materials. Dust particles aren’t just a nuisance for cleaning; they’re a billboard for a major health risk when asbestos decides to crash the party.
So, when dealing with renovations, water damage, or a fresh coat of paint, the priority is ensuring a clean surface and using inexpensive products wisely to avoid any asbestos dust drama.
Remember, diving into a DIY project or opting for an inexpensive hammer drill to tackle holes in walls without considering the hazardous reality of the ceiling is a gamble with your well-being. From concrete anchors for that heavy art piece to a simple touch of paint, the essence of home improvement marries safety with aesthetics.
And let’s not forget, amidst the beautification and safety measures of your home, adding house plants can enhance your living space, contributing to cleaner air without the asbestos concern.
Engaging with your current community or a community for developers could reveal invaluable insights on navigating the asbestos puzzle, ensuring your home remains a fortress against unseen threats.
Tackling asbestos is a journey best undertaken with caution, knowledge, and a team of professionals. It’s not just about dodging fines or adhering to the law; it’s about creating a sanctuary that stands resilient against the whispers of the past.
Preparing to Drill into a Popcorn Ceiling
Drilling into a popcorn ceiling is a task that requires a bit of planning and the right tools to do the job without making a big mess. Here’s how to get ready for the task, making sure everything goes smoothly from start to finish.
Safety Gear Required
- Wear a mask to keep dust out of your lungs.
- Use safety goggles to protect your eyes.
- Put on gloves to avoid cuts and keep your hands clean.
Selecting the Right Drill and Drill Bit
- Choose a drill that lets you adjust the speed for more control.
- Pick a sharp drill bit that’s the right size for the hole you need. It’s better to start small; you can always make the hole bigger.
Environmental Safety Tips
- Lay down cloths or sheets to catch the dust and protect your furniture.
- Keep the air moving by opening windows or using a fan.
- If there’s any chance your ceiling has asbestos, call in pros to handle the drilling. It’s not worth the health risk to do it yourself.
Drilling into a popcorn ceiling doesn’t have to be a daunting task. With the right preparation and tools, you can do it neatly and safely. Just remember, safety comes first, especially when dealing with older ceilings that might contain asbestos. Taking these steps ensures a smooth process and a clean finish, making your project a success.
Drilling into a Popcorn Ceiling Safely
Drilling into your popcorn ceiling can seem tricky, but with a clear step-by-step guide and the right precautions, you can do it without causing a mess or risking your health. Here’s how to tackle the task while keeping your ceiling looking good and minimizing any risks, especially from asbestos if it’s in your ceiling.
Gear Up for Safety

Before anything else, put on your safety gear. This means a mask to avoid breathing in dust or asbestos fibers, goggles to protect your eyes, and gloves to keep your hands safe.
Check for Asbestos

If your home was built before the 1990s, there’s a chance your popcorn ceiling contains asbestos. Get a sample tested by professionals before you start. If asbestos is found, it’s best to let expert removal services handle the job.
Prepare the Area
Lay down drop cloths or plastic sheeting on the floor and over any furniture. This makes cleanup easier and protects your stuff from dust.
Ventilate the Room

Open windows or use a fan to keep the air in the room moving. This helps clear out dust and reduces your exposure to any harmful particles.
Select the Right Tools
Use a drill with a variable speed setting to give you more control. Choose a drill bit that’s the appropriate size for the hole you need, starting smaller to avoid making the hole too big by mistake.
Drill Carefully

Begin drilling at a slow speed to avoid damaging the ceiling’s texture more than necessary. Keep the drill steady and apply gentle pressure. If you need a larger hole, you can gradually increase the size of the drill bit.
Minimize Dust
As you drill, pause occasionally to let the dust settle, and then vacuum up the debris with a vacuum cleaner fitted with a HEPA filter. This helps reduce the spread of dust and potential asbestos fibers.
Patch if Needed
If the drilling process causes some of the popcorn texture to flake off around the hole, you can use a popcorn ceiling patch product to touch up the area once you’re done.
By following these steps, you can drill into your popcorn ceiling safely and neatly, preserving its unique texture while completing your project.
Remember, taking it slow and being prepared with the right tools and safety gear makes all the difference in getting the job done right without exposing yourself to unnecessary risks.
Hanging Decorations from Popcorn Ceilings
Thinking about sprucing up your space with some decorations hanging from the ceiling? With popcorn ceilings, you’ve got to be a bit crafty to avoid damage and keep things safe.
Whether you’re hanging something light as a feather or a bit heavier, there are ways to do it right. Here’s how to hang decorations from your popcorn ceiling without any fuss.
Determine the Weight of Your Decoration
- Knowing how heavy your item is will decide your approach. Lightweight items like paper lanterns or small plants are easier and have more options for hanging.
For Lightweight Items
- Adhesive Hooks: Look for hooks that stick directly to the ceiling. Make sure the packaging says they’re for textured surfaces. Stick them on carefully, following the instructions to avoid the popcorn texture from peeling.
- Tension Rods: If you have an alcove or a recessed space, use a tension rod to hang lightweight decorations. It’s a no-damage option, perfect for temporary decorations.
For Heavier Items
- Find a Ceiling Joist: Use a stud finder to locate a joist in your ceiling. Drilling into a joist gives you a secure point to hang heavier items like large plants or heavier lights.
- Use the Right Anchor: If you can’t find a joist where you need one, use a toggle bolt anchor designed for heavier loads. Drill carefully to insert the anchor without damaging too much of the texture.
Alternative Hanging Solutions
- Magnetic Hooks: If you’re lucky to have metal strips in your ceiling, magnetic hooks are a brilliant, drill-free option.
- Suction Cups: These work well if you want to hang very lightweight items directly from a smooth surface on the ceiling.
Creative Decorating Ideas
- Sky’s the Limit: Hang small, lightweight LED fairy lights across the ceiling using adhesive clips for a starry-night effect.
- Floating Garden: Use lightweight, faux plants for a hanging garden look. Tension rods or adhesive hooks can hold these without trouble.
- Seasonal Decor: For seasonal decorations like Halloween spiders or Christmas angels, lightweight adhesive hooks are perfect as they can be easily removed later.
Hanging decorations from a popcorn ceiling isn’t hard—it just needs a bit of thought. Keeping safety in mind, especially with heavier items, ensures your decorations add joy without damage.
Whether you go for a temporary sparkle with fairy lights or a more permanent fixture, there’s always a way to make your ceiling work for you. Just remember, with popcorn ceilings, gentle is the way to go to keep that unique texture intact.
Modern Alternatives to Popcorn Ceilings
Popcorn ceilings, once a hit for their easy application and noise reduction qualities, are now often seen as outdated by many homeowners. Beyond style preferences, concerns about asbestos (in older homes) and the desire for a smoother, more modern look are leading many to consider alternatives.
If you’re thinking about saying goodbye to your popcorn ceiling, here are some modern, safe, and attractive options, along with tips on how to make the change safely.
Firstly, understanding why a change might be on your mind is important. Popcorn ceilings can make a home feel dated, and they’re notorious dust collectors, which can be a hassle to clean. Plus, if there’s damage or discoloration, repairs can be tricky to blend seamlessly.
When it comes to alternatives, there’s a whole world of options:
- Smooth Ceilings: Achieving a smooth finish involves scraping off the popcorn texture and refinishing the ceiling. This look is timeless and opens up a room, making it feel brighter and more spacious.
- Knockdown Texture: Less textured than popcorn but still providing some dimension, a knockdown finish is a great compromise if you want a bit of character without the heaviness of popcorn.
- Painted Beams and Planks: Adding wooden beams or planks can transform your ceiling into a focal point, adding warmth and character to the room.
- Coffered and Tray Ceilings: These options add architectural interest and can make a room feel more luxurious. They’re especially suited to formal spaces or high ceilings.
- Stretch Ceilings: Made from a piece of material stretched over a frame, these are great for creating a perfectly flat, reflective ceiling that can even mimic the look of a high-gloss paint job.
Switching out a popcorn ceiling does come with its set of challenges, especially if asbestos is a concern. For ceilings installed pre-1990s, testing for asbestos is a must. If asbestos is present, removal should be handled by professionals equipped to deal with hazardous materials safely.
For those free of asbestos or newer homes, DIY removal can be an option, though it’s messy and time-consuming. Covering the popcorn with planks or drywall is another route, offering a fresh canvas without the need to scrape.
No matter which route you choose, updating your ceiling can significantly impact your home’s look and feel, bringing it into the modern age. It’s a way to freshen up your space, potentially increase your home’s value, and rid yourself of the maintenance and aesthetic drawbacks of popcorn ceilings.
Just remember, tackling a ceiling update is a big job, and taking the necessary precautions, especially regarding asbestos, is crucial for a safe and successful renovation.
Conclusion
When it comes to dealing with popcorn ceilings, especially those that might contain asbestos, caution is key. Before making any changes or starting a project, testing for asbestos is crucial to ensure your home’s safety. If asbestos is present, it’s best to call in professionals who have the expertise to handle it safely.
Remember, updating your home’s look should never compromise the health and safety of its occupants. Balancing aesthetics and safety is essential, and getting the right advice can help you make informed decisions for a safer, more stylish home.
Read Also – Can You Drill Into Walls in A Rental?
Can You Use Impact Driver Bits in A Drill
Knowing whether you can swap impact driver bits into a regular drill matters more than…
Can You Drill Into Popcorn Ceiling
Wondering Can You Drill Into Popcorn Ceiling for your next home improvement project? Popcorn ceilings,…
Can You Drill Into Walls in A Rental?
Renting an apartment brings the challenge of personalizing your space within the confines of rules…
Can I Use a 1/4 Drill Bit Instead of 7/32
When you’re elbows deep in a project and suddenly realize the 7/32 drill bit you…

Can You Drill Concrete Without A Hammer Drill
Drilling into concrete requires both precision and the right tools, notably a hammer drill and…

Can You Use Different Brand Drill Bits?
The right drill bit size is crucial for any project, big or small. It’s the…